This website uses cookies so that we can provide you with the best user experience possible. Cookie information is stored in your browser and performs functions such as recognising you when you return to our website and helping our team to understand which sections of the website you find most interesting and useful.
Vyhledávání
WHY
By making measurements and analyses, we turn hypotheses into facts. As only facts can inform decisions based on which objective can be attained as quickly and safely as possible.
HOW
Extensive experimental equipment enables us to measure a large scale of physical and chemical quantities under different conditions. A strong knowledge base, traditionally represented by universities and institutes of the Academy of Sciences ensures expert interpretation of results.
WHAT
The range of analytical methods is extensive, covering subjects such as optical and electron microscopy, structural analysis etc. – in simple terms, anything from tearing a tensile specimen apart to taking part in the Higgs boson discovery.
Example: Analysis of protective layer adhesion strength
The analysis of mechanical resistance of a protective thin layer prepared by the NCC for MATCA can serve as a good example of valuable feedback to quality inspections or the development of new materials.
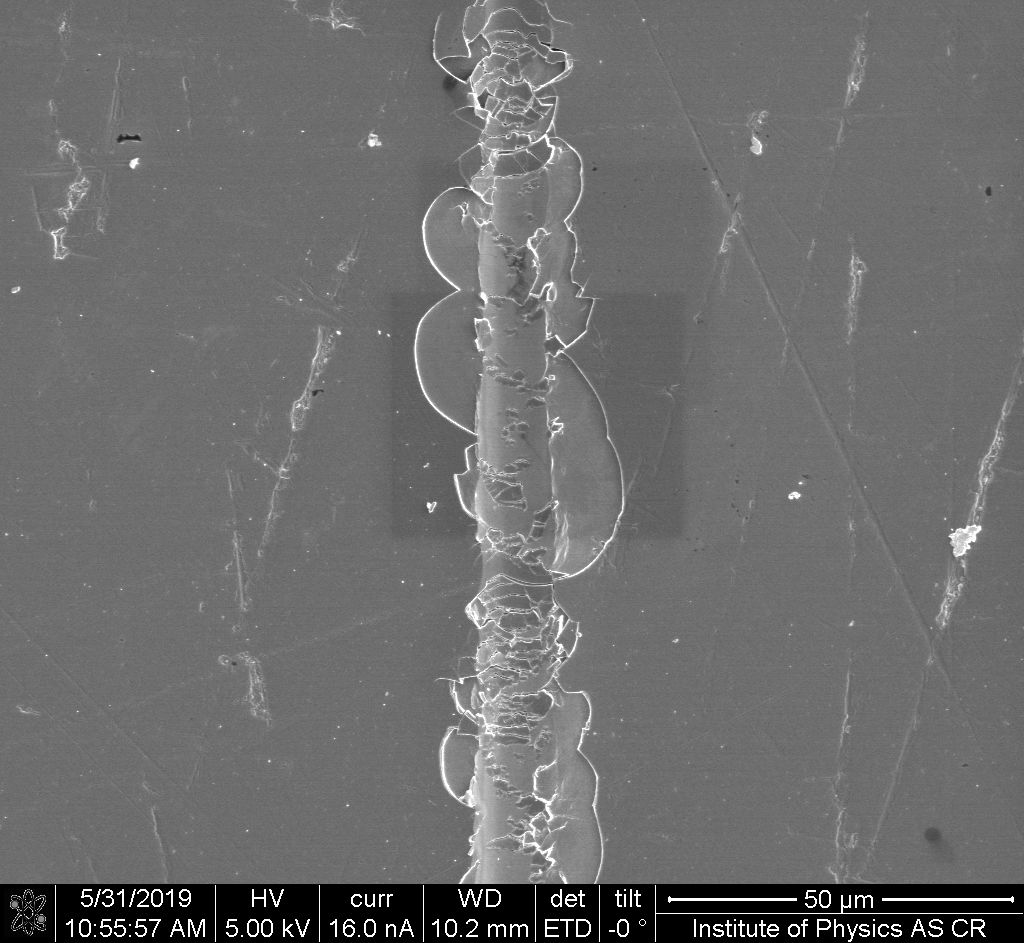
1. During an indentation test, a tested layer is repeatedly exposed to a predetermined pressure applied by a tip, which moves along a predetermined route on the surface of the sample. The pressure on the tip is gradually increasing until a controlled damage of the layer occurs.
The image shows a protective layer, applied on a steel substrate and subjected to a destructive indentation test.
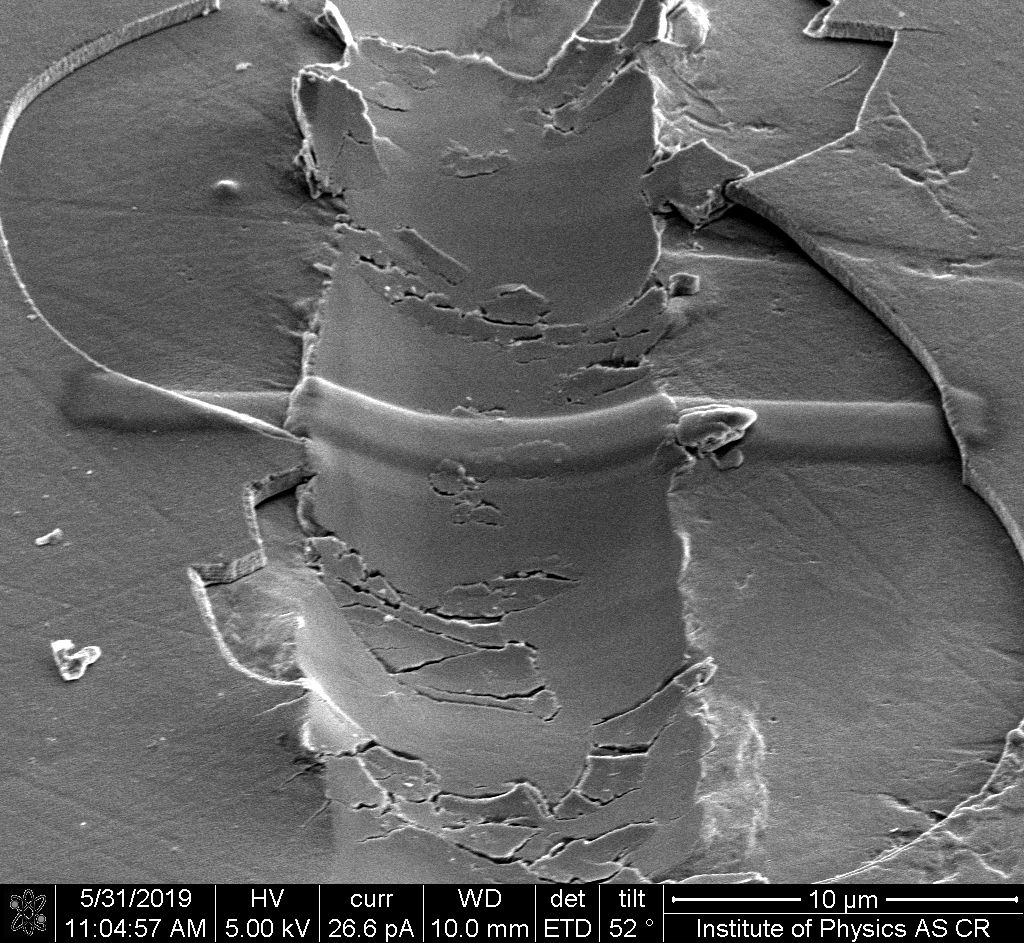
2. Using a high-magnification of a scanning electron microscope, it is possible to analyse the nature of the layer failure.
The image (in the middle) captures a platinum protective layer, which was applied in the microscope to protect the sample when parts of the specimen were indented to create a cross-section of the tested layer.
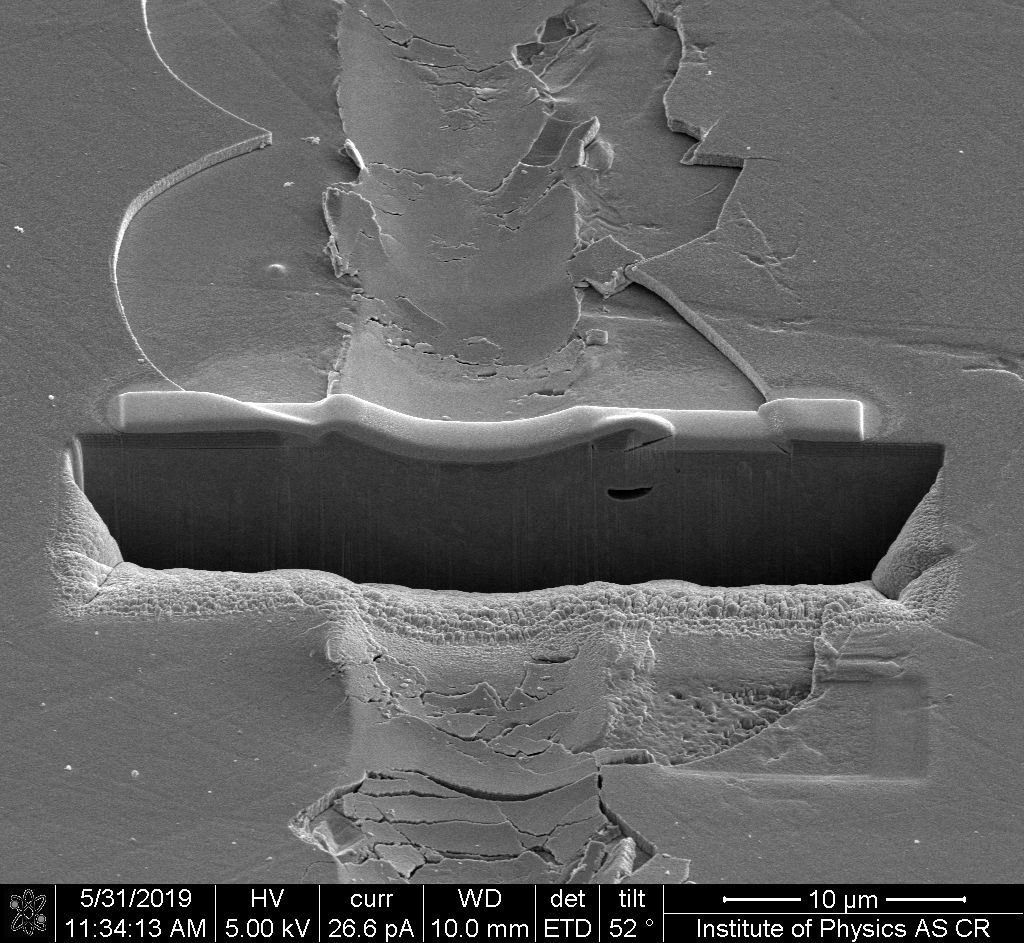
3. Using a focused ion beam, an impression is formed, the back wall of which represents a cross-section of the studied layer.
Good adhesive strength is also demonstrated by the presence of the protective layer fragments, impressed deep into the deformed steel substrate.
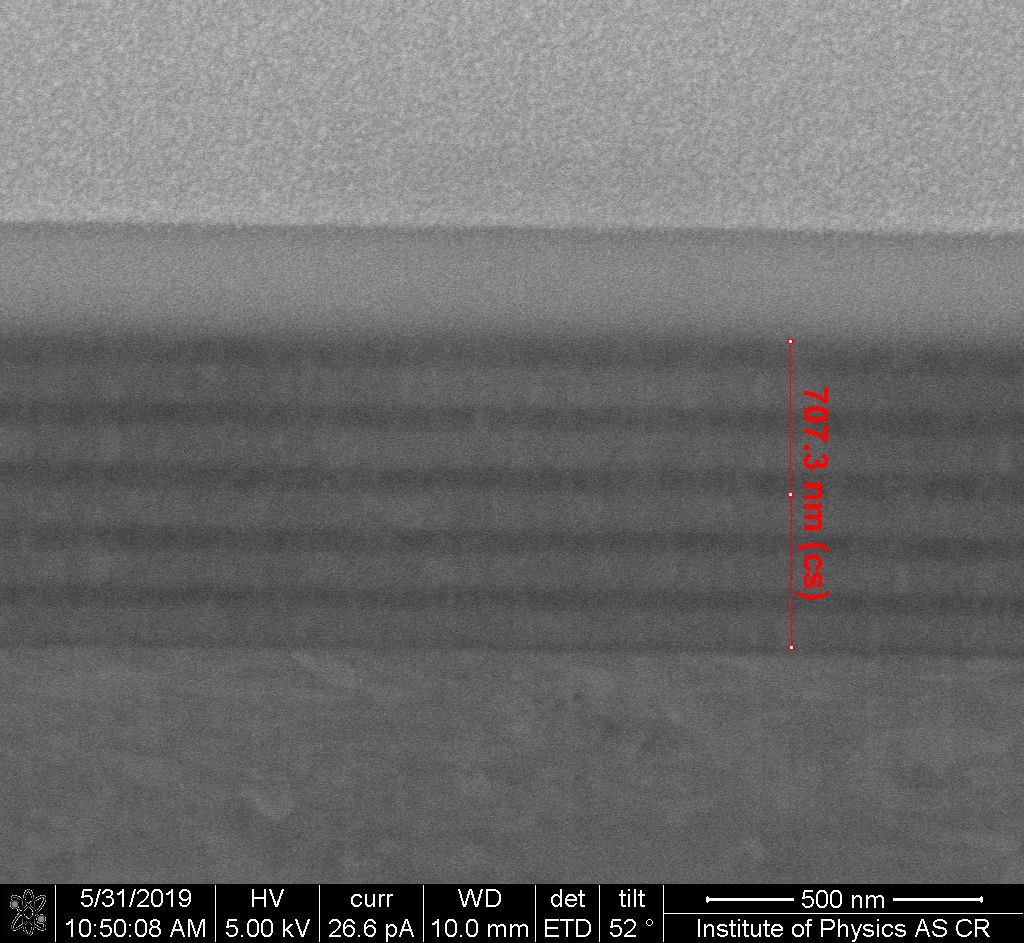
4. The cross-section captures a steel substrate, a composite protective layer, and a platinum protective layer, which prevents the damage of the sample when the impression is being made by the focused ion beam.
The image shows clearly discernible steel substrate grains, as well as individual layers of the composite coating.
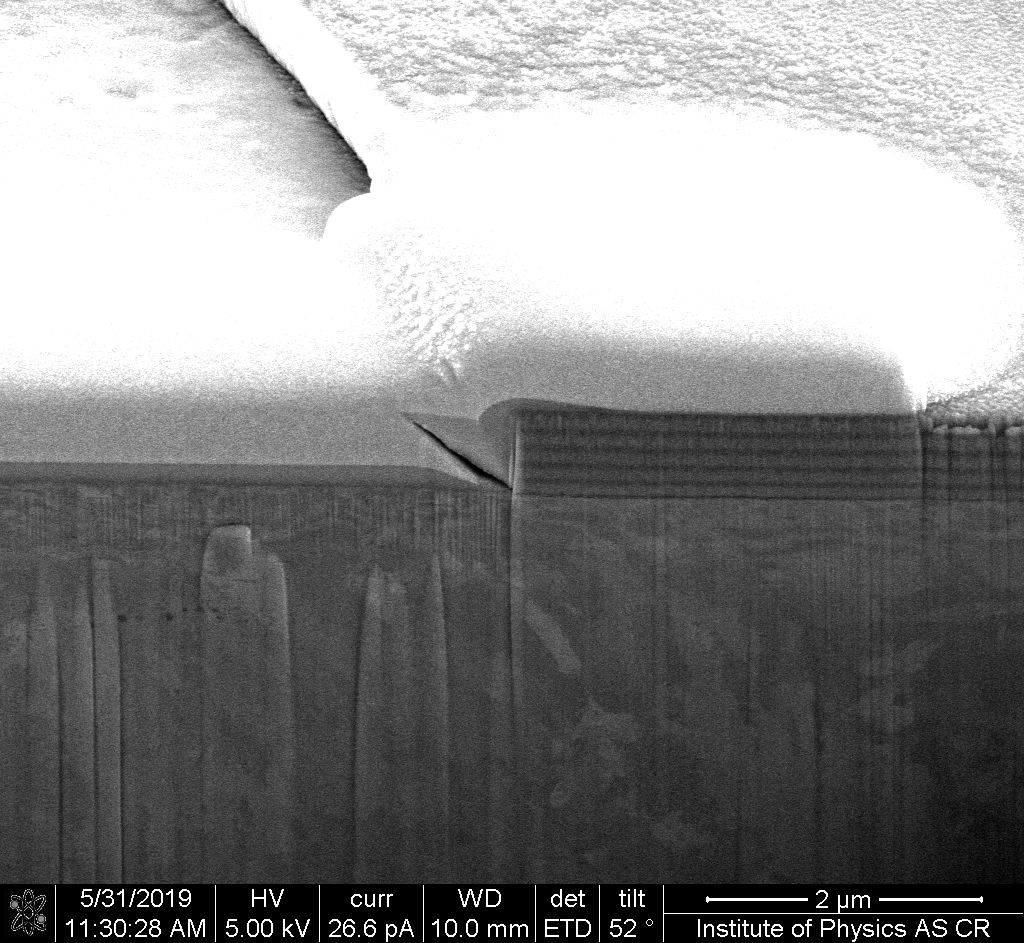
5. A cross-section detail also shows good adhesive strength in the other parts of the damaged layer. The thickness of the composite layer is about 700 nm.
The scanning electron microscope can perform chemical or structural analyses of the studied sample.
Do you have any questions?
The range of analytical methods available in the NCC for MATCA is too extensive to be fully outlined here. If you have any questions concerning a specific application, don’t hesitate to contact us.
Related technologies
Scanning electron microscope (SEM)
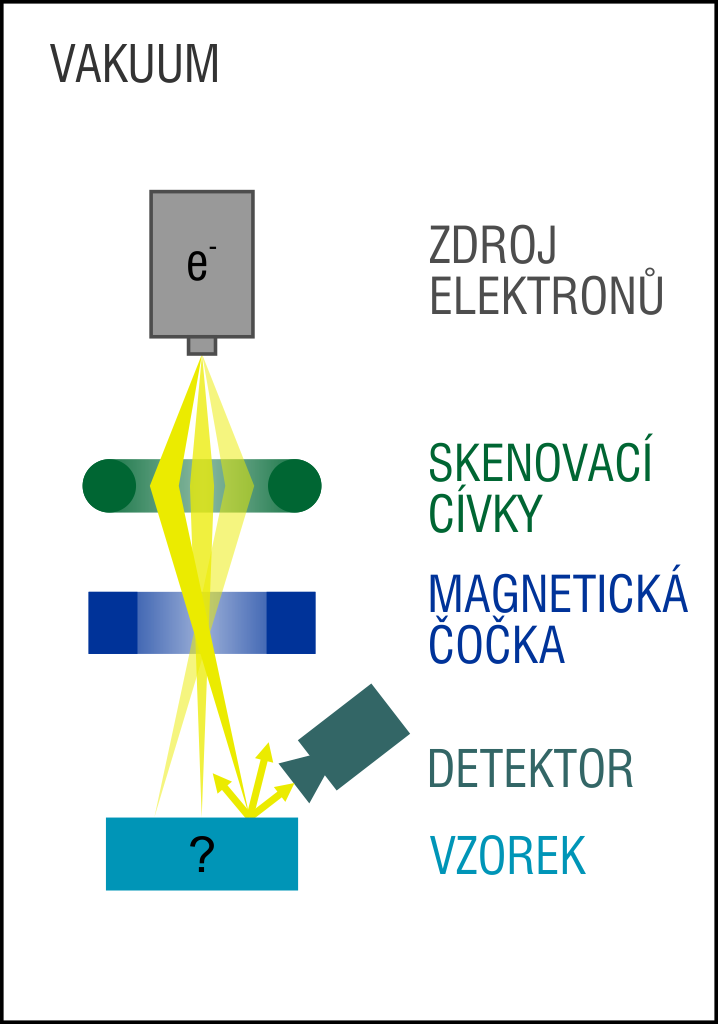
The scanning electron microscope (SEM) is, like any other microscope, an optical instrument which unlike traditional microscopes uses electrons instead of photons as a source of radiation and electromagnetic lenses instead of glass lenses. The entire internal space, the electron beam, and the sample are located in vacuum to prevent electrons from interacting with the atmosphere. To study or analyse a sample’s surface, we use the electron beam-sample interactions to obtain a number of data on e.g. the sample’s microstructure, crystallographic ordering or chemical composition etc. More >>
Available in the NCC for MATCA:
SEM – FEI Quanta 3D FEG, SEM – FEI Phenom, SEM – Tescan MAIA-3,
SEM – FEI/Philips 30XL
Energy-dispersive X-ray spectroscopy (EDS)
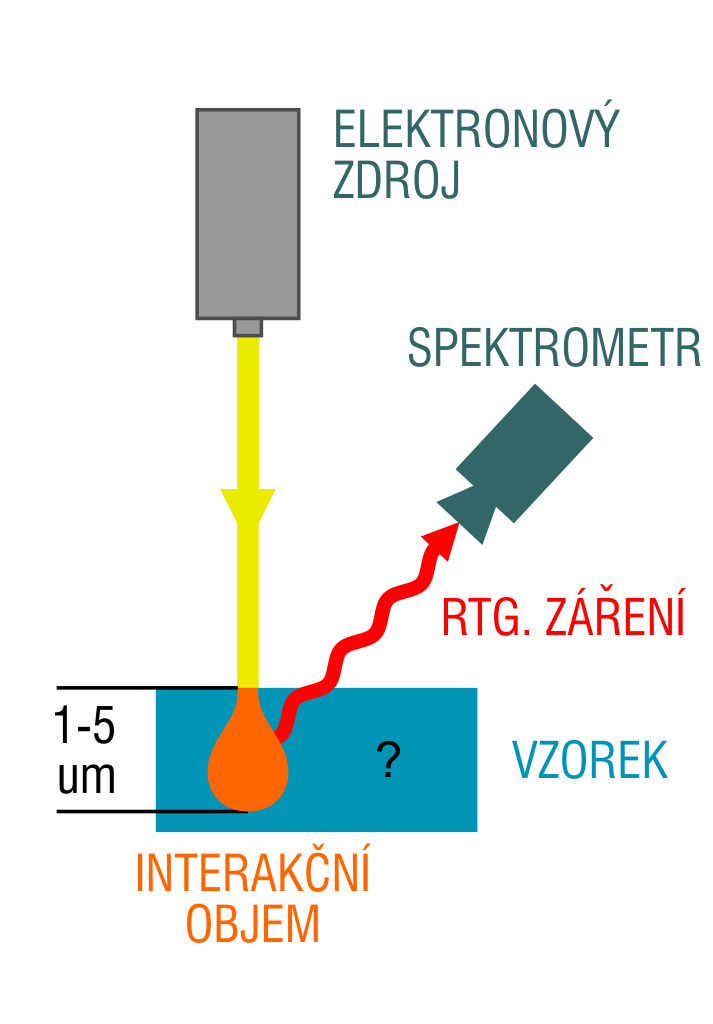
Energy-dispersive X-ray spectrometry (EDS) is an analytical method based on the detection of characteristic X-rays emitted during interactions between an electron beam and the surface of the sample. From energies of the photons emitted in these interactions, we obtain the EDS spectrum, enabling us to determine individual constituent elements of the sample, as well as their quantities. The EDS detectors are usually a part of SEM or TEM. More >>
Available in the NCC for MATCA:
EDS – SEM – FEI Quanta 3D FEG, EDS – S/TEM – FEI Tecnai F20 X-twin
Related services
Diagnostics of production process
Correct diagnosis of a production process or the determination of part failures enables us to take a quick remedial action, to make targeted innovations or maintain business relationships.

Analysis of 3D printing powders
An analysis of 3D printing powders is a must in the case of new materials or suppliers and a welcome standard for maintaining high-quality production.


 The NCK for MATCA is supported by the